Renovating is exciting, but small slips can be costly and delay everything. The good news: with method, it is possible to avoid most mistakes and turn the project into a solid, efficient, and sustainable experience.
Next, an actionable summary to get started on the right foot — and then each part deepens the critical points with practical examples, checklists, and comparisons.
| Short on time? Here’s the essential: ⏱️ | |
|---|---|
| ✅ Key tip | Immediate value |
| Map priorities and create a 15–20% buffer in the budget 💸 | Avoid last-minute cuts and hasty decisions |
| Conduct a technical diagnosis of humidity and structure before intervening 🧰 | Prevents rework and recurring leaks |
| Invest in continuous insulation and eliminate thermal bridges 🧱 | Real comfort and lower energy bills ⚡ |
| Choose sustainable materials with low VOC emissions 🌿 | Better air quality and health at home |
| Formalize scope, schedule, and responsibilities with the contractor ✍️ | Reduces conflicts and delays, predictable project 📅 |
Smart planning and budgeting: how to avoid the most costly mistakes in renovations
The most common mistake in a renovation is starting at the end: choosing finishes before understanding the technical reality of the property. Robust planning arises from the intersection of usage priorities, current state diagnosis, and a realistic budget with margin for unexpected issues. Without this foundation, the risk of overruns increases exponentially, especially in projects with structural reinforcement, layout changes, or energy upgrades.
A safe path begins with defining clear objectives. Thermal comfort? Reduction in bills? Accessibility? Each objective changes the project’s design and should be translated into concrete requirements, such as insulation levels, air tightness, or selection of ventilation equipment. Next, a technical survey evaluates humidity, cracks, old installations, and possible legal limitations. This survey guides the sequencing of the project and prevents “surprises” behind the wall.
Diagnosis and well-defined priorities
Without diagnosis, the project proceeds blindly. Simple tests (thermography, moisture measurement, roof inspection) identify critical points that need to come before aesthetics. The Silva family discovered, for instance, that 30% of discomfort stemmed from drafts through old openings. By rehabilitating frames and air tightness before furnishing, they achieved immediate comfort and saved on air conditioning.
Prioritizing also means saying “no” to some initial desires. A ceiling shower can wait if the roof shows leaks; in that case, the roof wins. The balance comes from understanding cause and effect: correcting “the shell” of the house (thermal envelope) eliminates symptoms that would otherwise require permanent and costly solutions, like constant heating.
Realistic budget and safety buffer
No budget is immune to unforeseen issues. What exists is a well-prepared budget. A 15–20% buffer covers typical renovation findings: non-compliant wiring, corroded pipes, unexpected reinforcements. Without this reserve, the project enters stress and decisions tend to sacrifice precisely what generates long-term value, such as insulation and air tightness.
Structure the budget by chapters (demolition, structure, envelope, MEP, interiors) and link each chapter to a measurable goal. This way, any adjustment preserves the overall performance. And use a financial schedule: some expenses (windows, insulation) should be anticipated to avoid stalling subsequent stages.
- 🧭 Set measurable goals (e.g., 40% reduction in consumption)
- 🔎 Conduct a technical survey with photos and measurements
- 📊 Create a chapter-based budget with a 15–20% buffer
- 📅 Align payments to project milestones, not fixed dates
- 🧩 Prioritize the envelope and installations before finishes
| Frequent mistake 😬 | How to avoid it ✅ | Impact € |
|---|---|---|
| Starting with finishes | Sequence: structure → envelope → MEP → finishes | −10 to −25% in rework |
| No financial buffer | Reserve 15–20% for unforeseen issues | Avoids stoppages ⛔ |
| Poorly defined scope | Descriptive memorial with tolerances and marks | Fewer conflicts ⚖️ |
For those who want to delve deeper into the theme of priorities and investment for impact, materials and practical guides are compiled at Ecopassivehouses.pt, focusing on decisions that truly change the performance of the house. The central idea: every euro should work for comfort and efficiency, not for improvisation.
Summary of the part: technical planning + clear priorities + buffer = predictable project.

With the financial and technical map in hand, the next step is to protect the foundation: structure and humidity, the invisible roots of many chronic problems.
Structural and humidity errors: preventing damage and rework in renovations
Humidity is silent and persistent. When ignored, it reappears behind new paint and compromises insulation, coverings, and even the health of those inhabiting the space. The same goes for structural issues: small cracks, subtle settling, and poorly executed connections can escalate if the renovation increases loads or alters the building’s behavior. In both cases, the mistake is treating symptoms instead of causes.
The first principle is simple: water always wins if there is no strategy. Mapping points of entry (roof, facade joints, thresholds, drains) and retention points (basement walls, thermal bridges that condense) allows for surgical action. In old properties, the interface between new and old systems is often the critical zone — especially in frames, eaves, and junctions with metal structures.
Humidity diagnosis before painting
Painting over mold is just covering up the problem. Use moisture meters and, if possible, thermography to identify cold areas prone to condensation. In humid climates, mechanical ventilation with heat recovery resolves the cause: excess indoor vapor. In basements, peripheral drains and waterproof membranes are often the right answer, combined with exterior insulation whenever possible.
Structural interventions with criteria
Opening spans, removing walls, and creating open spaces modifies load distribution. The classic mistake is assuming that any wall is removable without reinforcement. An evaluation by an engineer and a light reinforcement plan (metal profiles, laminated wood beams) maintain safety and prevent deformations over time. Remember that insulation and air tightness also interact with the structure, especially in roofs.
Real case: in a 70s apartment, fine cracks appeared after replacing the flooring with a heavier one. The subsequent reinforcement cost twice what it would have cost if planned. The lesson is clear: calculate weights and assess the whole before choosing materials solely for aesthetics.
- 🧪 Use thermography and meters to locate moisture and thermal bridges
- 🏗️ Validate structural walls before any demolition
- 💧 Resolve water entry (roof, drains, joints) before repainting
- 🌬️ Consider MVHR with heat recovery for vapor control
- 🛡️ Prefer external waterproofing when feasible
| Problem 🌧️ | Root cause 🔍 | Sustainable solution 🌿 |
|---|---|---|
| Recurring mold | Condensation due to thermal bridges | Continuous insulation + MVHR with recovery |
| Peeling paint | Leakage from roof/drains | Membranes, well-detailed flashings, water tightness tests |
| Cracks after renovation | Load changes without reinforcement | Structural project and light reinforcement 🧱 |
To visualize strategies for efficiently combating humidity in ventilated accommodations, see a practical explanation in this video research.
Focus idea: dry, ventilate, and reinforce before decorating. This way, the renovation lasts longer and comfort is no longer seasonal.
Thermal insulation and energy efficiency: where the greatest waste occurs
Among the decisions that most affect daily life and expenses, continuous insulation and the elimination of thermal bridges are at the top. The recurring mistake is investing in powerful air conditioning equipment to compensate for a weak envelope. It’s like heating the street: costly, noisy, and inefficient. Good insulation creates stable comfort, reduces temperature peaks, and lessens dependence on equipment.
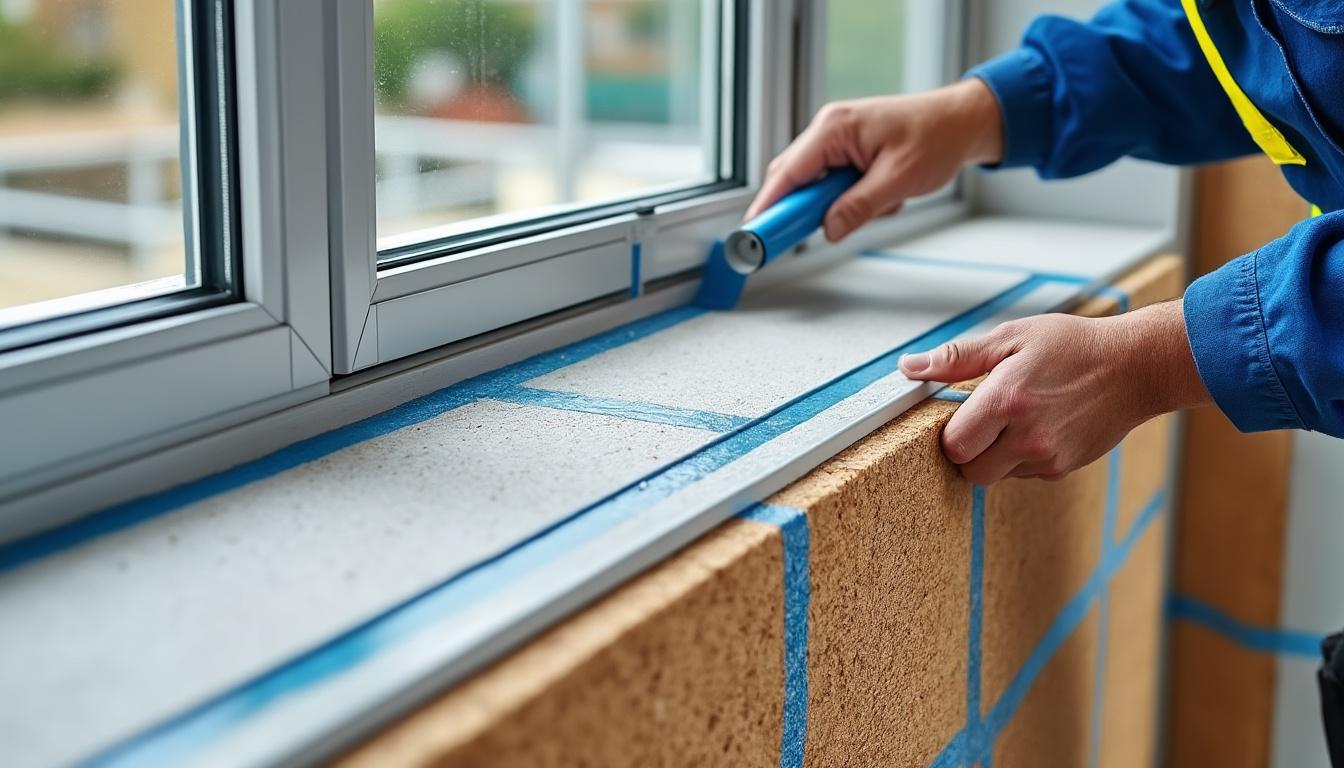
Another frequent mistake is poorly insulating joints: finishes at windows, junctions of slabs with facades and coping stones. In these points, small discontinuities create cold zones and condensation. In well-detailed projects, the design of finishes receives as much attention as the thickness of the material. Performance is a result of the whole, never of an isolated component.
Materials and techniques that work
In rehabilitation, solutions such as external insulation (ETICS), expanded cork, blown cellulose, and wood wool offer a good balance between performance, sustainability, and acoustic comfort. Where external insulation is not feasible, interior insulation with a carefully sized vapor barrier may work — provided thermal bridges are addressed and interstitial condensation risk is controlled.
Windows, shading, and ventilation
Replacing frames with models that have thermal breaks and double or triple glazing is a quality leap. But without adequate shading, summer can remain uncomfortable. Brise, external blinds, and selective films reduce solar gains. Meanwhile, mechanical ventilation with heat recovery ensures fresh air without penalizing energy, which is essential in tighter homes.
- 🧱 Prioritize continuous insulation and flawless finishes
- 🪟 Prefer windows with low Uw and good installation
- 🌞 Design shading for summer, especially to the west
- 🌬️ Adopt MVHR with appropriate filters for air quality
- 🧮 Use energy simulation to validate key decisions
| Solution 🔧 | Direct benefit ⚡ | Execution note 📝 |
|---|---|---|
| ETICS 8–12 cm | −35 to −55% in losses | Treat finishes in windows and coping stones |
| Triple glazing with thermal break | Acoustic and thermal comfort 🎧 | Installation with expanding tape and sealing |
| MVHR with recovery | Fresh air with low consumption | Quarterly filter maintenance 🧼 |
Want to see comparative examples of efficient envelopes and finishing details? Explore tutorials and technical tours focused on energy rehabilitation.
Conclusion of this part: proper insulation means spending less every month — comfort is not a luxury, it’s the right project.

With the envelope under control, the choice of materials and the destination of waste define the environmental impact and the indoor air quality of your renovated home.
Sustainable materials and waste management: choices that enhance your renovation
Selecting materials is much more than choosing colors. Each product carries an environmental footprint, behavior over time, and direct effects on indoor air quality. Common mistakes include opting for solvent-based paints, aggressive adhesives, and flooring with high VOC emissions. The environment thanks when the choice favors materials with certifications and transparent origins.
Certified woods, cork, mineral paints, and lime mortars bring clear benefits: low emissions, hygroscopic regulation, and reparability. Additionally, dismantlability — the ability to remove and reuse — gains relevance in 2025, when the circular economy has ceased to be a trend and has become a design criterion. Minimizing permanent adhesives and preferring interlocking systems facilitates maintenance and recycling.
Selection criteria that truly matter
Assess performance, toxicity, life cycle, and local availability. A perfect catalog material may be unfeasible if logistics are complex or if the workforce lacks application experience. On the other hand, vernacular solutions like Portuguese cork show how tradition and innovation can go hand in hand, delivering thermal and acoustic comfort with low impact.
Waste: from cost to opportunity
Without planning, dumpsters fill with a mix of rubble and useful materials. Separating at the source reduces disposal costs and allows for the reuse of doors, hardware, and metals. In many cities, cooperatives collect woods and glass for reuse. The practical step is to include waste management in the specifications, with goals and identified containers on site.
- 🌿 Prefer low-emission materials (recognized eco-labels)
- 🪵 Value certified wood and cork from controlled sources
- 🧴 Use adhesives and sealants with low VOC
- 🔁 Plan for dismantlability and reuse before gluing/nailing
- 🚮 Separate waste by type: inert, metal, wood, plastic
| Category ♻️ | Smart choice 🌟 | Practical gain 💡 |
|---|---|---|
| Paints | Mineral/silicate, solvent-free | Healthier air and breathable walls |
| Insulation | Cork, cellulose, wood wool | Thermal/acoustic comfort with low impact |
| Flooring | Certified wood, natural linoleum | Durability and easy maintenance 🧽 |
| Waste | Separation at the source | Lower disposal cost and more reuse |
For references, guides, and case studies on selecting low-emission materials, there is a curated collection of updated content at Ecopassivehouses.pt. The goal is simple: choices that provide comfort today and health in the future.
Key phrase: the right material improves the air you breathe and reduces waste.
Schedule, permits, and contractors: mistakes that stall the project and how to avoid them
With the project defined, the work relies on two pillars: paperwork in order and a well-aligned team. Delays in permits, communication failures, and vague contracts are the recipe for frustration. A realistic schedule considers approval times, material delivery deadlines, and the availability of skilled labor — especially for air sealing and insulation details, which require refined techniques.
Clear contracts protect all parties. The descriptive memorial needs to list brands, minimum performance, and execution tolerances. The classic error is to “kick” decisions to the work. In practice, this increases costs and conflicts. Combined with a weekly on-site communication plan, with photographic records and meeting minutes, understanding improves and deviations are corrected early.
Permits and compatibility
Renovations with structural, electrical, or plumbing changes require specific approvals. Anticipating documentation, plans, and calculations avoids dead times. Use a compatibility matrix between architecture, structure, and installations. Small inconsistencies resolved on paper save days on site.
Choosing contractors: competence and quality culture
Low price without a history is an illusion. Look for portfolios of similar projects and confirm references. Details like blower-door tests, finish records, and cleanliness of the site are signs of rigor. Combine payments with objective milestones: completion of tested insulation, verified installations, sealed windows. And include warranty clauses and responses to pathologies.
- 🗂️ Organize permit documentation with deadlines and responsibilities
- 📋 Detailed and compatible descriptive memorial
- 🤝 Contract with quality milestones and guarantees
- 📸 Weekly photographic records and meeting minutes
- 🧪 Validation tests (air tightness, pressurization, commissioning)
| Risk 🚩 | Prevention 🛠️ | Quality indicator 📐 |
|---|---|---|
| Delay in permits | Submit early, checklist of documents | Deadlines monitored in a simple Gantt |
| Inadequate contractor | References and visited projects | Portfolio of energy rehabilitation 🧾 |
| Floating scope | Closed memorial and formal addendums | Fewer change requests 🔒 |
An immediate action that helps a lot: create a visible board on site with the macro schedule, responsible parties, and emergency contact. Transparency keeps the project moving forward.
Pocket idea: clear paperwork and the right team are worth more than haste.
Indoor air quality, acoustics, and comfort: discreet errors that diminish quality of life
Renovating only for appearance is to lose half the value. Indoor air quality and acoustic comfort determine how the house is lived on a daily basis. The typical mistake is sealing the house to improve efficiency while forgetting controlled ventilation. Another slip is underestimating noise: lightweight doors, poorly sealed frames, and rigid flooring without adequate underlayment create echoes and constant discomfort.
Healthy environments require low-emission materials and a coherent ventilation strategy. In kitchens and bathrooms, extractors connected to the MVHR balance the removal of vapor and odors without wasting energy. Indoor plants help, but do not replace filters and calculated air exchanges. In bedrooms, pay attention to acoustic bridges in blind boxes and installation passages.
Simple measures with high returns
Choosing mineral paints, solvent-free adhesives, and low-emission furniture reduces headaches and allergies. For sound, resilient underlayment beneath flooring, acoustic baseboards, and sealing of outlets in lightweight walls reduce transmissions. A small investment in acoustic planning avoids makeshift solutions after moving in.
Monitoring and maintenance
CO₂ and humidity sensors alert to ventilation adjustments and detect problems early. MVHR filters require maintenance, as do drains and traps to avoid odors. Comfort is a system, not an isolated component. Therefore, plan maintenance into the project: easy access to filters, ducts, and controls make everyday use lighter.
- 🌬️ Ensure adequate air renewal rates by compartment
- 🧴 Prefer low-emission finishes (VOCs)
- 🔇 Treat the impact floor with resilient underlayment
- 📈 Monitor CO₂ and humidity to adjust ventilation
- 🧰 Plan accessible maintenance for filters and ducts
| Aspect 🌡️ | Common mistake 😵 | Good practice 🌟 |
|---|---|---|
| Ventilation | Sealing everything without air renewal | MVHR with recovery and controls for CO₂ |
| Acoustics | Ignoring impact noise | Underlayment under flooring and sealing junctions 🔇 |
| Materials | Adhesives and paints with solvents | Products with low emissions and certification |
If you have to choose just one action now: verify the planned ventilation rates and confirm that filter maintenance is accessible. Daily comfort will thank you.
Guiding line: clean air and silence are worth as much as a new kitchen.
Now do a simple thing: list three performance priorities (e.g., thermal comfort, clean air, silence) and check if your project and budget allocate resources to each. If the answer is modest, adjust today — it is cheaper on paper than in the project.
How much should I reserve as a buffer in the renovation budget?
A reserve between 15% and 20% covers common unforeseen issues (non-compliant old installations, reinforcements, hidden leaks). This buffer prevents hasty decisions that tend to cut exactly what generates the most value: insulation, air tightness, and ventilation.
Is it better to insulate from the inside or the outside?
Whenever possible, from the outside (ETICS, cork, ventilated facade) because it reduces thermal bridges and condensation risks. Insulating from the inside can work, but requires a well-sized vapor barrier and increased attention to finishes.
Do I really need mechanical ventilation in a tighter house?
Yes. By improving air tightness, the air no longer renews through infiltrations. The MVHR with heat recovery guarantees fresh air, controls humidity, and maintains energy efficiency, improving health and comfort.
How to choose a contractor for efficient renovation?
Look for portfolios of energy rehabilitation, verifiable references, and availability for tests (blower door, finishing records). Formalize scope, quality milestones, and guarantees in the contract.
Are sustainable materials more expensive?
Not always. Many have similar costs and savings over their life cycle (less maintenance, better durability). The secret is to specify well and compare by performance and useful life, not just by initial price.


