Building an efficient passive house is simpler when one masters the logic of thermal comfort, healthy air, and minimal energy consumption. This practical guide brings together proven principles and concrete decisions to turn a project into real performance.
| Short on time? Here’s the essentials: |
|---|
| ✅ Insulation and windows: aim for U of walls ≤ 0.15 W/m²K and Uw of windows ≤ 0.8 W/m²K to cut heat losses 🚀 |
| ✅ Airtightness: plan for the blower door test and aim for ≤ 0.6 ACH50; careful sealing prevents hidden expenses 💨 |
| ✅ Recovery ventilation: HRV/ERV with ≥ 90% efficiency ensures clean air without wasting energy 🌬️ |
| ✅ Bioclimatic design: orient the house south, provide shading in summer, and use PHPP to predict consumption accurately ☀️ |
Thermal insulation and envelope: the heart of an efficient passive house
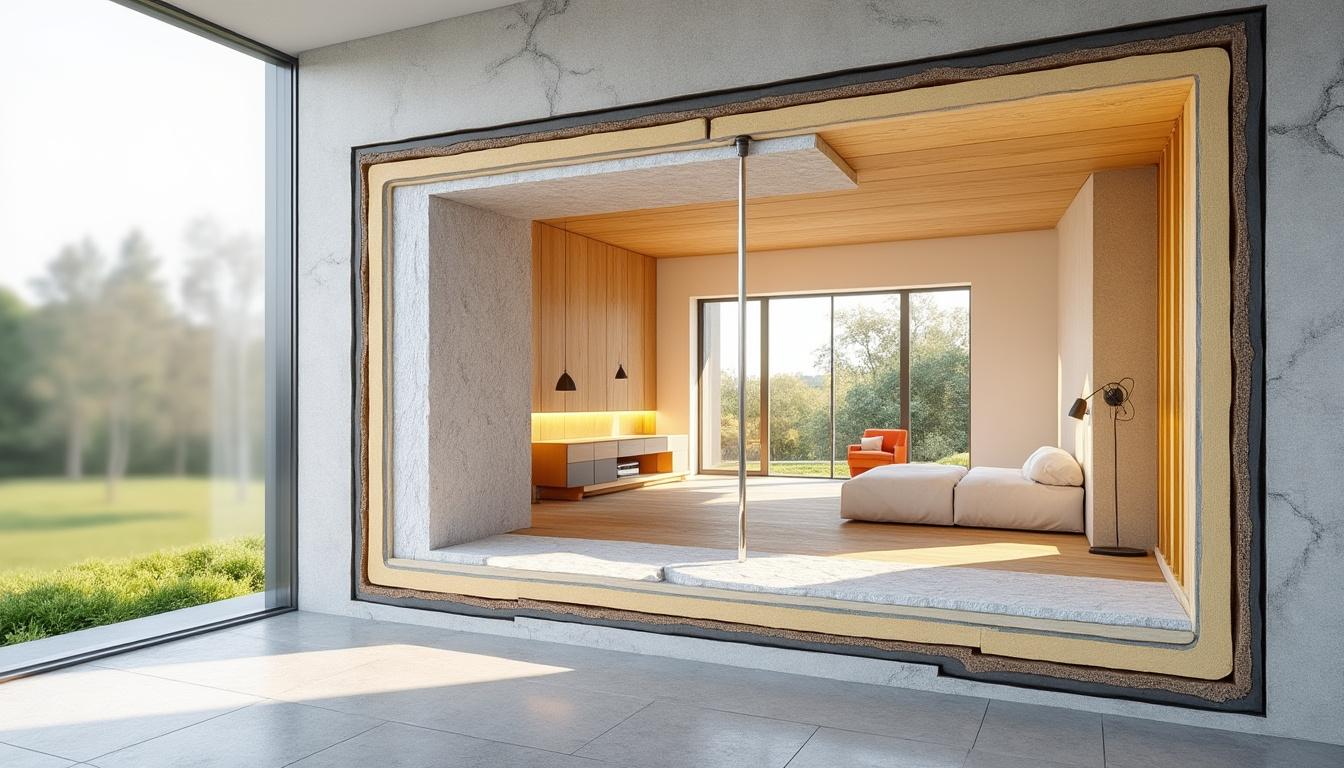
A passive house starts with a super-insulated and continuous envelope. The goal is to reduce thermal transmittance (U-value) to levels where heat hardly escapes, even with abrupt temperature changes. In Portugal, with diverse climates from Bragança to Faro, a solid starting point is walls ≤ 0.15 W/m²K, roofs ≤ 0.10 W/m²K, and floors ≤ 0.12 W/m²K. By achieving these values, the need for heating and cooling drops dramatically.
What does this mean in practice? Instead of the typical 6–8 cm of insulation, often 14–24 cm is required, depending on the material and local climate. Blown cellulose, wood wool, expanded cork, mineral wool, and spray foams offer different combinations of performance, sustainability, and cost. Biobased materials like hemp and recycled fibers (e.g., denim) have evolved and, when well-designed, maintain stable performance over the long term.
To ensure a coherent envelope, execution is as important as material choice. Thermal bridges at the junctions of slabs, columns, and frames undermine insulation effectiveness. A poorly resolved detail creates cold zones, risks of condensation, and localized discomfort. Detailing—before construction—avoids costly improvisations.
U-values, thicknesses, and material choices
Comparing materials by their thermal conductivity (λ), density, and hygrothermal behavior helps dimension the right thickness. Blown cellulose, for example, fills voids well and reduces settling when installed by certified applicators. Wood wool combines insulation and inertia; Portuguese expanded cork offers low environmental impact and good stability.
- 🌡️ Performance target: Wall ≤ 0.15; Ceiling ≤ 0.10; Floor ≤ 0.12 W/m²K.
- 🧱 Continuity: keep insulation continuous with no cuts at corners, floors, and tops of walls.
- 🌿 Sustainability: prefer materials with low embodied emissions and recyclability.
- 🧪 Verification: simulate in PHPP and adjust thicknesses to local climatic reality.
An example: at “Casa Martins” in Viseu, replacing 8 cm of mineral wool with 20 cm of cellulose and 60 mm of exterior cork reduced heating loads by about 45% compared to the initial study. Correcting linear thermal bridges at the threshold and slab-to-facade junction did the rest.
| Material 🧰 | λ (W/m·K) 📐 | Advantages 💡 | Work Notes 🛠️ |
|---|---|---|---|
| Blown cellulose | 0.037–0.040 | Excellent fill; good phase shift ⏳ | Requires certified density and applicator |
| Wood wool | 0.036–0.045 | Good summer performance; acoustic comfort 🎧 | Precise cuts, attention to fittings |
| Expanded cork | 0.038–0.040 | Low impact; moisture resistance 🌧️ | Great for ETICS and thermal bridges |
| Spray PU | 0.024–0.028 | High performance with low thickness 🚀 | Attention to emissions and recycling |
Avoiding a common mistake—undersizing thickness—ensures that the investment translates into comfort. It is worthwhile to validate choices with local climatic data in PHPP and with shared construction experience on platforms like Ecopassivehouses.pt. Final insight: the envelope is your main “heating system”.

High-performance windows and doors: cutting losses and gaining solar
Openings are the most frequent thermal weak point. In passive houses, triple-glazed windows with low emissivity (Low-E), chambers filled with inert gas, and frames with thermal breaks achieve Uw ≤ 0.8 W/m²K; doors ≤ 1.0 W/m²K. The result is less heat loss, comfortable interior glass, and no drafts near the openings.
The orientation and solar factor (SHGC) should be chosen according to the climate. South-facing helps gain in winter; west and east prioritize solar control. Glass with selective control reduces overheating without “shutting off” natural light. Additionally, overhangs, shades, and adjustable brise-soleils ensure summer comfort.
Frames, installation, and sealing: where performance is gained (or lost)
Installation dictates real performance. Windows should be placed on the insulation plane, with appropriate sealing tapes and spacers that do not create thermal bridges. The interface with plaster or the ETICS system must be continuous, without gaps. The same applies to entry doors: thresholds without thermal breaks ruin the overall effort.
- 🪟 Performance: look for certifications and Uw tested by an independent laboratory.
- 🧰 Installation: insulation plane, sealing tapes, and low expansion foam.
- 🌞 Useful gains: maximize south exposure in winter; effective shading in summer.
- 🔧 Maintenance: replaceable seals and adjustable hardware increase longevity.
In a rehabilitation study in Aveiro, replacing double-pane windows (Uw ≈ 2.8) with triple panes (Uw ≈ 0.8) reduced losses through openings by ~71%. Radiant comfort increased so much that the residents stopped “escaping” from the areas near the glass in winter.
| Parameter 🔍 | Recommended 🟢 | Comfort impact 😌 | Choice notes 🧭 |
|---|---|---|---|
| Uw (window) | ≤ 0.8 W/m²K | Warm surfaces, less condensation | Certification and reliable testing |
| Low-E glass | Yes, with argon gas | Reduces radiative losses | Balance with solar factor (SHGC) |
| Frame | Wood, PVC, or aluminum with RT | Thermal bridge break 🌉 | Durability and local maintenance |
| Installation | Triple sealing and insulation plane | Avoid infiltration and leaks | Approved details in construction |
For those who appreciate natural ventilation, tilt-and-turn windows with micro-opening help, as long as integrated into a strategy that does not compromise airtightness. In summary: good window + good installation = Passivhaus result.
Before proceeding to airtightness, it is worth noting that a well-specified opening can provide light, warmth in winter, and silence. Without this, the passive house becomes a challenge.
Airtightness and thermal bridges: the duo that stops invisible losses
It is not enough to insulate: sealing is essential. Airtightness means closing all leaks, from the baseboard to the gutter, so that the hot/cold air does not escape. The reference target is n50 ≤ 0.6 h⁻¹ in the blower door test (50 Pa difference), a value that confirms a continuous air barrier. This prevents unwanted drafts, protects the insulation from moisture, and ensures that mechanical ventilation works efficiently.
The pathway to this result begins in the design: defining the “red line” (air barrier) continuously in the project, selecting compatible membranes, tapes, and sealants, and training the construction team. Prefabricated pieces, dry construction, and CLT panels help control tolerances and joints. In rehabilitation, the EnerPHit standard allows ≤ 1.0 h⁻¹, still demanding.
Blower door, details, and timely correction
The blower door test identifies weak points through thermography and smoke testing. It is wise to perform it at least twice: after closing the envelope and before the final finishing stage. Adjustments at that point are quick and inexpensive.
- 🧵 Sealing: high-adhesion acrylic tapes, smart membranes (variable vapor pressure) and durable mastics.
- 🔎 Critical zones: cable passages, window boxes, flashings, window/wall connections.
- 📋 Control: weekly inspections and airtightness checklists during construction.
- 🏗️ Thermal bridges: balcony supports, embedded columns, and thresholds deserve details with low conductivity materials.
Thermal bridges are “shortcuts” for heat to escape. Eliminating them involves continuous insulation and components with thermal breaks. Autoclaved aerated concrete (AAC) blocks and specific supports for balconies reduce linear loss and prevent cold spots.
| Problem ⚠️ | Effect 🥶 | Recommended solution ✅ | Observation 🔧 |
|---|---|---|---|
| Gaps in window boxes | Infiltration and noise | Certified airtight boxes | Perimeter seals and local testing |
| Threshold without RT | Cold foot and condensation | Profile with thermal break | DRAINAGE and capillary cut |
| Console balcony | Linear thermal bridge | Isolated connector 🌉 | Structured detail in design |
| Poorly sealed MEP passages | Air and moisture losses | Specific sleeves and tapes | Interleaving test with blower door |
When airtightness works, the house maintains temperature with little effort, and the incoming air passes through the ventilation filters, not through cracks. Final insight: sealing is as crucial as insulating.
With the envelope controlled, the next step is to ensure healthy air with minimal energy losses.
Heat recovery ventilation and humidity control: pure air, energy saved
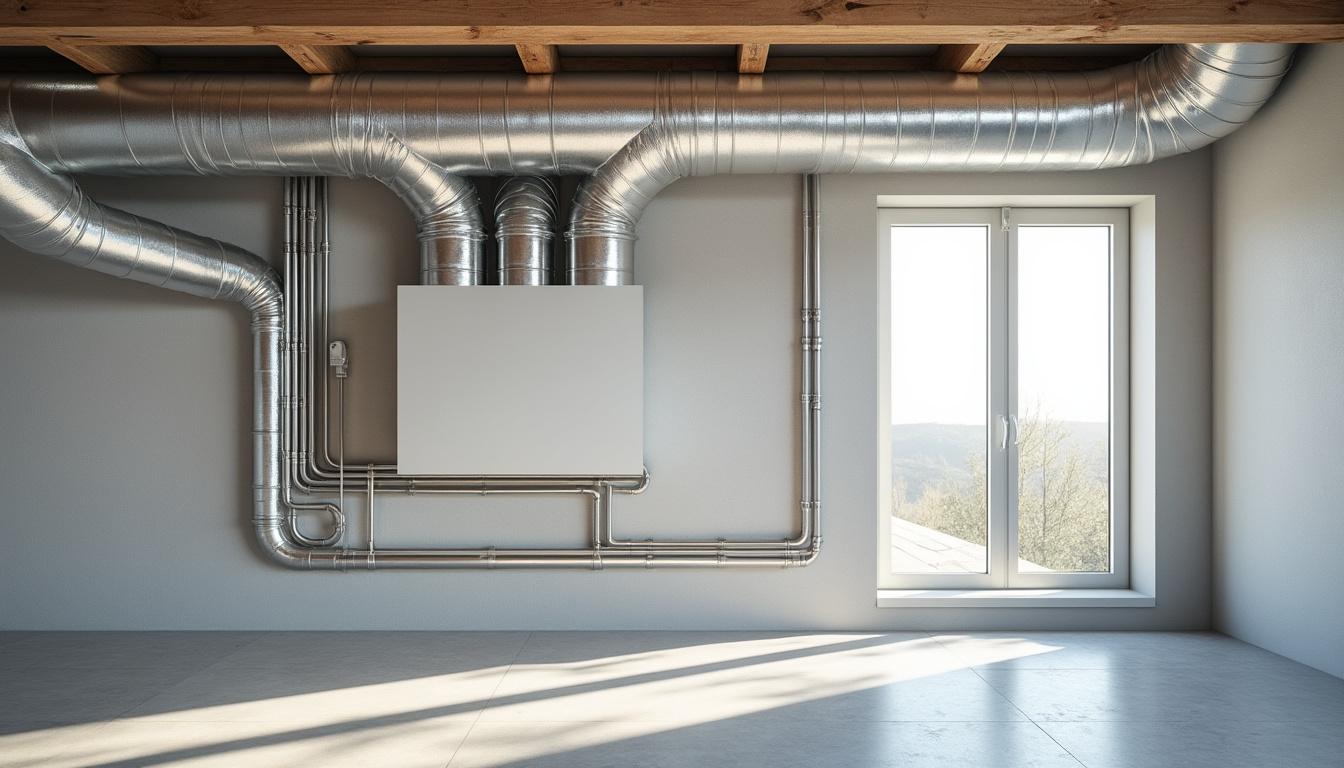
Passive houses are airtight, so indoor air quality relies on mechanical ventilation with heat recovery (HRV) or energy recovery (ERV). Systems with efficiency ≥ 90% recover heat from air exhausted in kitchens and bathrooms and transfer it to the new, filtered, and fresh air. The result is a healthy environment, without significant energy losses and without mold.
HRV prioritizes heat transfer; ERV also manages humidity, useful in humid coastal areas. The decision depends on the climate and usage profile. The selection must consider flow rate per room, noise levels, specific consumption (W/(m³/h)), and F7–F9 (or ePM1) filters for pollen and fine particles.
Dimensioning, installation, and maintenance
The dimensioning should originate from the design. Simple paths, balanced networks, and acoustic attenuators avoid noise and pressure losses. In houses of 120–180 m², certified compact Passivhaus units usually suffice, provided the network is well designed. In multi-family buildings, efficiency scales—a well-adjusted central system can mean relevant collective savings.
- 🌬️ Efficiency: ≥ 90% recovery and low specific consumption.
- 🧼 Filtration: high-efficiency filters for allergens; scheduled changes.
- 🔊 Acoustic comfort: machine location and ducts treated for sound.
- 💧 Humidity: ERV in humid areas; well-executed condensate drains.
Humidity control does not solely depend on ventilation. “Breathable” materials like wood and gypsum/clay plasters help regulate vapor peaks. Proper waterproofing in bases and wet areas prevents water migration. Rainwater management on the lot protects foundations and improves hygrothermal comfort.
| Theme 🌡️/🌬️ | Best practices 🧠 | Direct benefit 🎯 | Quick checklist 📋 |
|---|---|---|---|
| HRV/ERV | Choose by climate and humidity | Pure air with energy savings | Efficiency ≥ 90% and low noise |
| Filtration | Filters ePM1 and pre-filters | Fewer allergies and pollen 🌼 | Biannual maintenance plan |
| Materials | Vapor-permeable plasters | Hygroscopic balance | Avoid wrong barriers |
| Waterproofing | Details in bases and balconies | No infiltrations/mold | Proper drainage and slopes |
In several tested projects, the combination of efficient HRV + hygroscopic materials reduced odors and condensations, stabilizing RH at 40–55%. Final insight: clean air and controlled humidity are invisible comfort that can be felt.

Solar orientation, PHPP, and planning: turning design into efficient construction
Bioclimatic design is the glue that connects insulation, framing, and ventilation. The south orientation (in the northern hemisphere) captures solar gains in winter; in summer, external shading—overhangs, blinds, deciduous trees—prevents overheating. The distribution of spaces follows this logic: living areas to the south/west, technical areas to the north.
The PHPP (Passive House Planning Package) models the building with local climatic data and each design decision: U-values, windows, shading, airtightness, internal loads. It is static but very reliable for annual energy; in hot climates, pay attention to peak loads—complementing with dynamic simulation helps in sizing shading and nighttime ventilation.
Step-by-step process and work verification
A clear roadmap avoids surprises: site study, bioclimatic concept, pre-dimensioning in PHPP, constructive details without thermal bridges, specifications requiring airtightness and testing, and a project management that verifies each step. In 2025, with more expensive energy and tight environmental targets, this rigor translates into lower bills and comfortable houses all year long.
- 🧭 Orientation: maximize south exposure; protect east/west in summer.
- 🧮 PHPP: iterate the model and adjust details before construction.
- 🧑🔧 Construction: interstitial and final blower door testing; photographic record of details.
- 🔋 Future: anticipate photovoltaics, prepare for batteries, and electric mobility.
The “Moradia Ribeiro” in Braga used PHPP to compare two designs. Scheme A had large glazing to the west without brise-soleils; Scheme B redistributed area to the south and introduced overhangs. Scheme B reduced cooling load by 28% while maintaining natural lighting, proving that initial drafts condition overall efficiency.
| Design decision 🧩 | Effect in PHPP 📊 | Optimization measure 🛠️ | Expected result 🏁 |
|---|---|---|---|
| Orientation and windows | Solar gains and losses | Review SHGC and brise-soleils ☀️ | Less summer cooling |
| Envelope (U-values) | Heating demand | More thickness where it pays off | Stable heat with less energy |
| Airtightness | Effective ventilation | Seals and tests | Comfort without drafts |
| Seasonal shadows | Temperature peaks | Overhangs and vegetation 🌳 | Controlled peaks in summer |
To close the loop, a simple action is worth mentioning: open the PHPP or request a preliminary study and test three window/orientation combinations. A decision made on paper avoids costly works in the future. For more practical ideas and case studies, explore Ecopassivehouses.pt.
{“@context”:”https://schema.org”,”@type”:”FAQPage”,”mainEntity”:[{“@type”:”Question”,”name”:”How much can I save with a well-designed passive house?”,”acceptedAnswer”:{“@type”:”Answer”,”text”:”Projects aligned with Passivhaus principles reduce energy for climate control by 70–90% compared to conventional construction, depending on climate, airtightness, and the performance of windows and envelope. The remaining consumption (lighting and appliances) can be partially offset with photovoltaics.”}},{“@type”:”Question”,”name”:”HRV or ERV: which to choose for Portugal?”,”acceptedAnswer”:{“@type”:”Answer”,”text”:”In humid coastal areas or in dwellings with high occupancy, ERV helps manage humidity. In drier or colder climates, HRV is often sufficient. The decision should consider local humidity measurements and the shading/ventilation strategy.”}},{“@type”:”Question”,”name”:”Is the blower door test mandatory?”,”acceptedAnswer”:{“@type”:”Answer”,”text”:”For Passivhaus certification, yes. Even without certification, testing is highly recommended: it identifies invisible leaks, allows for immediate corrections, and ensures the performance of ventilation and insulation.”}},{“@type”:”Question”,”name”:”Is it possible to apply these principles in a rehabilitation?”,”acceptedAnswer”:{“@type”:”Answer”,”text”:”Yes. The EnerPHit standard adapts to rehabilitations with realistic goals (e.g., 1.0 ACH50). Exterior insulation, high-performance windows, and correction of thermal bridges transform existing buildings.”}},{“@type”:”Question”,”name”:”What step can I take today in my project?”,”acceptedAnswer”:{“@type”:”Answer”,”text”:”Set clear goals: target U-values, n50 ≤ 0.6 h⁻¹, and ventilation ≥ 90% recovery. With these numbers, ask your designer for a preliminary PHPP study and validate two alternatives for orientation and windows.”}}]}How much can I save with a well-designed passive house?
Projects aligned with Passivhaus principles reduce energy for climate control by 70–90% compared to conventional construction, depending on climate, airtightness, and the performance of windows and envelope. The remaining consumption (lighting and appliances) can be partially offset with photovoltaics.
HRV or ERV: which to choose for Portugal?
In humid coastal areas or in dwellings with high occupancy, ERV helps manage humidity. In drier or colder climates, HRV is often sufficient. The decision should consider local humidity measurements and the shading/ventilation strategy.
Is the blower door test mandatory?
For Passivhaus certification, yes. Even without certification, testing is highly recommended: it identifies invisible leaks, allows for immediate corrections, and ensures the performance of ventilation and insulation.
Is it possible to apply these principles in a rehabilitation?
Yes. The EnerPHit standard adapts to rehabilitations with realistic goals (e.g., 1.0 ACH50). Exterior insulation, high-performance windows, and correction of thermal bridges transform existing buildings.
What step can I take today in my project?
Set clear goals: target U-values, n50 ≤ 0.6 h⁻¹, and ventilation ≥ 90% recovery. With these numbers, ask your designer for a preliminary PHPP study and validate two alternatives for orientation and windows.


